
Builder gel is revolutionizing the world of nail enhancements, offering a durable and versatile alternative for overlays, extensions, and creative nail art. Whether you’re searching for the best builder gel for beginners or exploring builder gel colors and designs, this guide covers everything from application techniques to essential tools like the gel brush and LED lamp. Discover key builder gel benefits, how to build a strong apex for natural nails, and expert tips for troubleshooting common issues. Read on for a comprehensive look at builder gel options, care, and the latest trends in nail beauty.
Featured Products
Best Overall • Best Value • Premium Option


Note: As an Amazon Associate I earn from qualifying purchases. Some of the links on this site are affiliate links — when you buy through those links, I may earn a small commission at no extra cost to you.
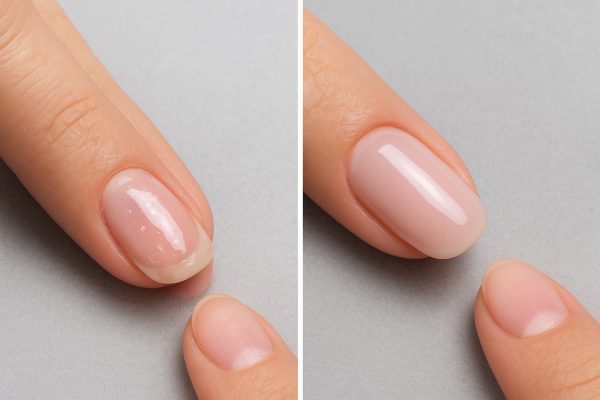
Builder gel overlays for natural nails and extensions
Builder gel overlays add strength and durability to natural nails. They create a protective layer that helps prevent breaks and splits. This technique can also be used for nail extensions, allowing users to build length with gel products and sculpting tools.
Builder gel nails are popular for overlays, extensions, and repairs. Many choose them for easy diy application and a natural gel finish. Typical builder gel kits cost $15–$40 per 15ml bottle. To achieve the best builder gel results, it helps to follow a step-by-step overlay and extension process overview.
Step-by-step overlay and extension process overview
- Prep nails by cleaning, shaping, and applying a dehydrator before using builder gel products.
- Apply a thin builder gel base layer with a brush, cure under a UV or LED lamp, then build the apex for added strength.
- Shape the cured overlay or nail extensions with a file, then finish with gel polish or a clear top coat.
- Remove any sticky residue with a lint-free wipe to reveal a glossy manicure or extension design.
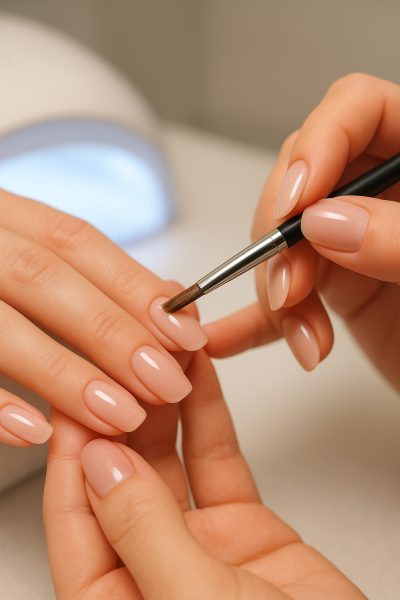
Application techniques using gel brushes and led lamp
Builder gel application uses a gel brush to control and shape the product. A led lamp cures the builder gel, hardening layers quickly. This technique delivers smooth overlays and precise nail extensions. It suits both overlays and builder gel nail art designs.
Start with a thin builder gel base, then build the apex using careful brush strokes. Cure each layer under the led lamp for best results. Using proper builder gel techniques prevents lifting and bubbles. Next, learn about Essential tools and proper builder gel application steps.
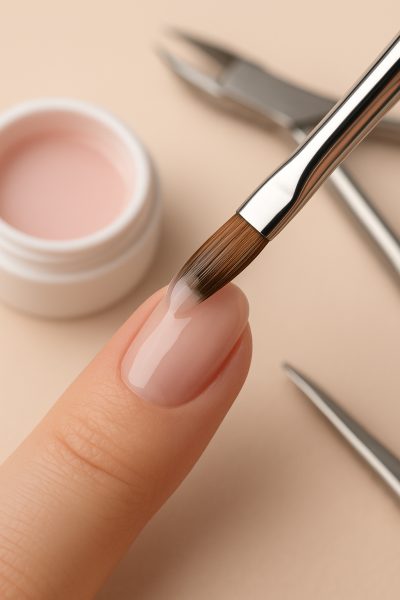
Essential tools and proper builder gel application steps
- Use a gel brush for precise builder gel application and smooth overlays on the nail surface.
- A quality led lamp ensures builder gel cures evenly and prevents problems like lifting or bubbles.
- Nail forms or tips help achieve builder gel extensions and sculpt different nail shapes.
- Lint-free wipes and acetone are needed for removing sticky layers and cleaning up builder gel nails.
Apex building and nail strength with builder gel
Builder gel helps create a strong apex for nail overlays and extensions. This apex acts as the highest point, adding support and durability. Using builder gel variations, such as clear or pink, enhances nail strength. Many choose this method for natural-looking, long-lasting gel nails.
Building a proper apex with builder gel reduces breakage and lifting. Nail artists use a gel brush and sculpting techniques to achieve the best builder gel results. Overlay designs, builder gel colors, and unique nail art all benefit from a solid apex. Next, learn effective techniques for shaping and reinforcing the nail apex.
Techniques for shaping and reinforcing the nail apex
- Use a builder gel brush to gently guide the gel toward the apex, creating the ideal curve for nail strength.
- Apply builder gel in thin layers, focusing on the center of the nail for added hardness and support.
- Sculpt the apex with clear or pink builder gel variations to achieve a smooth, natural-looking arch.
- Refine the apex shape with a file after curing to balance thickness and ensure a durable gel nail overlay.
Overlay care, removal with acetone, and aftercare tips
Builder gel overlays need regular care to keep nails strong. When it is time for removal, acetone helps dissolve builder gel products safely. Using proper gel removal techniques protects your natural nails and keeps overlays looking fresh between applications.
Always file the gel surface before soaking in acetone for removal. Use lint-free wipes to clean the nail after builder gel comes off. Nail builders and overlays may cost $15–$40 per 15ml unit. Gentle care is key, which leads to the next section on Best practices for safe removal and nail aftercare.
Best practices for safe removal and nail aftercare
- Use a gentle gel builder file to thin overlays before applying acetone wraps.
- Moisturize nails and cuticles with vitamin-enriched oil after builder gel removal.
- Avoid using metal tools that may scratch the nail plate during gel removal.
- Let nails rest between builder gel applications to maintain natural nail hardness.
Builder gel components, viscosity, and self-leveling properties
Builder gel contains special components that give it unique texture and flow. Viscosity describes how thick or runny the builder gel is. Self-leveling properties help builder gel smooth itself on the nail. These features make builder gel overlays and builder gel extensions strong and natural looking.
Different builder gel variations have different viscosity levels. Thicker gels work well for sculpting, while thinner builder gels are better for overlays. Entities like gel brush, polish, and nail are essential for precise application. Choosing the right build gel affects results. Next, explore key ingredients and choosing the right gel consistency.
Key ingredients and choosing the right gel consistency
- Acrylate monomers and photoinitiators in builder gel products affect viscosity and curing speed.
- Thicker builder gel variations are ideal for sculpting nail extensions and creating a strong apex.
- Self-leveling gels help polish and overlay designs appear smooth and even on the nail surface.
- Choosing a builder gel with added vitamins or hypoallergenic components can support nail health and comfort.
Creating nail art designs with glitter and rhinestones
Builder gel nails allow you to create unique gel art designs. Add glitter or rhinestones for extra shine and dimension. Use a gel brush to place each embellishment into the gel. This technique works for overlays, extensions, and builder gel nail art.
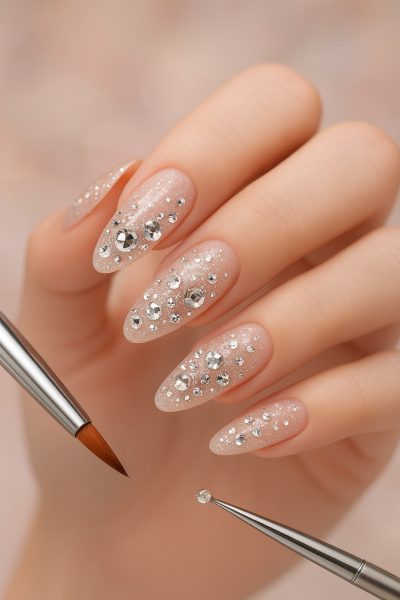
Apply builder gel as a base, then press glitter or rhinestone entities into the wet layer. Cure under a led lamp to secure your builder gel designs. You can mix builder gel colors for creative effects. Next, explore Decorating overlays with embellishments and gel accents for more inspiration.
Decorating overlays with embellishments and gel accents
- Place builder gel colors or glitter art between gel layers for depth in nail designs.
- Use a gel brush to embed rhinestones or sequins before curing overlays.
- Add small beads or pearls as gel accents to customize builder gel nails.
- Seal embellishments with a clear builder gel top coat for long-lasting polish and shine.
Comparing builder gel hardness and flexibility in manicure
Builder gel hardness and flexibility affect how gel nails feel and perform. Some builder gel types are very rigid, while others offer more flexibility. Choosing the right builder gel variation controls overlay strength, polish durability, and comfort for various nail art or extension needs.
Hard builder gels create strong overlays for sculpture and long extensions. Flexible builder gels suit overlays on natural nails, reducing breaks and lifting. Builder gel products with different viscosity levels give unique results. These gel builder differences set the stage for understanding the Differences between rigid and flexible builder gels.
Differences between rigid and flexible builder gels
- Rigid builder gel types provide maximum support for long nail extensions and sculpted nail art.
- Flexible builder gel variations move with the natural nail, reducing the chance of overlay cracks or lifting.
- Choosing the right builder gel system affects polish durability, gel hardness, and comfort in manicure results.
- Flexible builder gels are preferred for overlays on natural nails, while rigid gels suit structured sculpture designs.
Troubleshooting lifting, bubbles, and heat spikes in gels
Builder gel users often face issues like lifting, bubbles, and heat spikes. These problems can affect overlays, builder gel extensions, and gel nail art. Addressing these builder gel variations quickly helps maintain strong, smooth, and comfortable nails.
Lifting happens when builder gel does not bond with the nail. Bubbles may form if the gel is applied too thick or with trapped air. Heat spikes occur during curing, especially with thick gel layers. Understanding these builder gel effects sets up the discussion on Common problems and effective builder gel solutions.
Common problems and effective builder gel solutions
- Thin builder gel layers help prevent bubbles and ensure even curing with your led lamp.
- Avoiding gel on the cuticle area reduces lifting in builder gel overlays and extensions.
- Using a gel brush with controlled strokes minimizes trapped air and improves polish finish.
- Allowing the builder gel to self-level before curing reduces heat spikes and creates smoother nails.
Safety, allergies, and hypoallergenic builder gel solutions
Builder gel products can cause allergies or irritation in some users. Certain builder gel variations contain ingredients linked to skin sensitivity. Choosing hypoallergenic builder gel options helps reduce the risk of reactions. Always check the gel product label before use.
Some builder gel types are labeled HEMA-free or hypoallergenic for sensitive users. Nail art and overlay designs may use builder gel clear or pink options with fewer allergens. Prices for allergy-friendly builder gel range from $15–$40 per 15ml unit. Learn more in minimizing risks and choosing allergy-friendly formulations.
Minimizing risks and choosing allergy-friendly formulations
- Select builder gel products labeled hypoallergenic or HEMA-free to reduce the chance of skin irritation.
- Always patch test new builder gel variations on a small area of the nail before full application.
- Use gel brushes and lint-free wipes to avoid contaminating builder gel with allergens or dust.
- Opt for builder gel kits with clear ingredient lists and minimal harsh additives to support safer overlays.
Long-term gel polish wear and nail health maintenance
Long-term builder gel and gel polish wear keeps overlays looking fresh. Proper builder gel application supports nail strength and reduces breakage. Using gel nail products and following best builder gel techniques helps overlays last longer. Many users enjoy durable gel polish with healthy, natural nails.
Builder gel overlays can last two to four weeks with good care. Regular use of builder gel nail art or overlays protects the natural nail. Avoid aggressive filing or harsh polish removers. Products typically cost $15–$40 per 15ml. Next, explore Tips for maximizing wear and supporting nail health for stronger gel nails.
Tips for maximizing wear and supporting nail health
- Apply a builder gel base coat to reinforce overlays and extend gel polish durability.
- Use cuticle oil daily to hydrate nails and maintain flexibility in builder gel designs.
- Avoid prolonged exposure to harsh chemicals, which can weaken builder gel nails and overlays.
- Schedule regular infill appointments to keep builder gel extensions strong and prevent lifting.
Final Thoughts:
Builder gel is a game-changer for anyone seeking durable overlays or stunning nail extensions, offering a flexible alternative to traditional acrylics. Whether you’re a beginner exploring the best builder gel options or a seasoned pro perfecting your gel art, choosing the right builder gel product and essential tools like a quality brush and LED lamp ensures salon-worthy results. Prioritize proper application and aftercare to maintain strong, healthy nails. Ready to elevate your manicure? Explore top builder gel brands and start creating beautiful, long-lasting nail designs today!
Frequently Asked Questions (FAQs)
What is builder gel and how is it used for nail overlays or extensions?1
Answer: Builder gel is a thick gel product for overlays or extensions. Use a gel brush to apply it on natural nails or tips. Cure each layer with a LED lamp. The builder gel creates strong overlays, supports nail art, and helps sculpt extensions. It provides hardness, flexibility, and a smooth polish finish.
How do you properly apply builder gel with a gel brush and LED lamp?2
Answer: Prep nails and clean the nail plate. Apply builder gel with a gel brush in thin layers. Cure each layer under a LED lamp. Use overlays or nail forms for extensions. Shape the builder gel with a file. Finish with polish or gel top coat. Wipe nails with a lint-free wipe.
What are the benefits of using builder gel compared to acrylic or hard gel?3
Answer: Builder gel has no strong odor like acrylic. It offers flexible overlays and smooth polish. Builder gel cures quickly with a LED lamp. It is ideal for natural nail art and repairs. The gel builder is easy to file. It provides strength, versatility, and polish shine for nails.
How do you build a strong apex with builder gel for added nail strength?4
Answer: Use a gel brush to guide builder gel to the apex. Apply thicker gel at the nail center. Cure each builder gel layer with a LED lamp. Shape the apex with a file. This builder gel technique adds hardness and prevents breaks. It strengthens overlays and nail extensions.
What is the safest way to remove builder gel and care for your natural nails afterward?5
Answer: File the builder gel surface gently to thin overlays. Soak nails in acetone wraps. Use a lint-free wipe to clean residue. Moisturize with oil after removal. Builder gel kits help with safe overlays and polish removal. Avoid metal tools to protect the nail plate and nail health.
How do you choose the right builder gel viscosity and self-leveling properties for your needs?6
Answer: Thicker builder gel types suit sculpting extensions and apex building. Thinner, self-leveling builder gel is best for overlays. Check the product’s viscosity and self-leveling properties. Choose gel variations based on your nail art or overlay style. The right builder gel affects application, hardness, and polish finish.
What are common problems like lifting or bubbles with builder gel, and how can you fix them?7
Answer: Lifting happens if builder gel touches the cuticle. Bubbles form from thick layers or trapped air. Apply builder gel in thin, even layers. Use a gel brush for smooth overlays. Cure each layer with a LED lamp. File and clean the nail before applying builder gel or polish.
Are there hypoallergenic or allergy-friendly builder gel options for sensitive users?8
Answer: Yes, some builder gel products are hypoallergenic or HEMA-free. Check the builder gel label for allergy-friendly ingredients. Use builder gel with clear, simple formulas. Patch test before a full overlay. Sensitive users should choose gel variations with minimal harsh entities. This helps reduce irritation and supports safe overlays.
Social Media Links
Last Updated on February 13, 2026 by msj484
DISCLAIMER (IMPORTANT): This information (including all text, images, audio, or other formats on FamilyHype.com) is not intended to be a substitute for informed professional advice, diagnosis, endorsement or treatment. You should not take any action or avoid taking action without consulting a qualified professional. Always seek the advice of your physician or other qualified health provider with any questions about medical conditions. Do not disregard professional medical advice or delay seeking advice or treatment because of something you have read here a FamilyHype.com.