
Are you curious about the DIY electric skateboard and other new products, such as the battery pack and motor mounts? You can also learn about the parts you build in motors, motor engines, and even electric skateboard parts. It also includes the maintenance of skateboard parts or just a quick view of the regular price of the electric skateboard parts.
We have all experienced the thrill of gliding on a skateboard, feeling the wind rush past our faces. But what if we told you that you could take this experience to a whole new level? Imagine a skateboard powered by a motor, giving you an effortless drive through the streets. Imagine effortlessly accelerating up hills and cruising at speeds that manual skateboarding can’t match, all with the freedom and excitement of the power of electricity. This enhanced mode of travel allows you to cover more ground quickly and have a quick view of it, adding a futuristic twist to your rides.
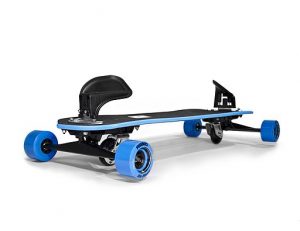
Building a DIY electric skateboard can significantly increase your control and customization. Start by choosing a high-quality truck that can handle the drive system’s power. Consider a dual-motor setup for better traction and performance, especially when riding in hilly areas. Although the initial price might be steep, investing in durable parts ensures a smoother ride and potentially lowers long-term costs. Plus, mastering the assembly of your board can be an exciting and rewarding challenge.
Check for any sale online for those looking to purchase boards. Feel free to contact their customer service or FAQ section if you need any assistance. You can check YouTube for detailed tutorials on building your skateboard, including installing pulleys and other components.
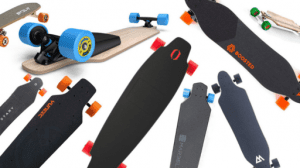
E-Skateboard Kits
To build an electric skateboard, you’ll need a DIY electric skateboard deck, some skateboard parts, a motor, a speed controller, batteries or a battery pack, motor mounts, other new products or parts built for it, and various tools. Safety is crucial, and riders should wear certified helmets and protective gear while practicing before riding at high skateboarding speeds.
Understanding common issues with your DIY electric skateboard and their solutions is essential for a smooth skateboard ride. Customizing your electric skateboard with unique skateboard designs, wheels, and accessories allows you to express your style and personality.
Regular maintenance and care are important to preserve the life and performance of your DIY electric skateboard. Building and customizing your DIY electric skateboard is an exciting and rewarding journey that enhances your longboarding adventures.
The Basics Of DIY Electric Skateboards
Before you commence your epic DIY electric skateboard project, you must understand the basics of an electric skateboard and how each component works in harmony to provide a thrilling electric skateboard ride. Many enthusiasts opt for an electric skateboard kit to jump-start their new build, but understanding the underlying principles can give you an edge.
Electric skateboard physics and power requirements dictate how smoothly your DIY electric skateboard will roll or climb hills. Quick adjustments and an understanding of different electric skateboard types can significantly enhance performance. Learning more about the electric skateboard empowers us to serve others better.
Now, let’s get ready to gather the necessary materials and tools to build an electric skateboard. A DIY electric skateboard comprises a battery, motors, wheels, deck, and other electronic components. You can buy all these motors and parts online, and they offer worldwide shipping to ensure you get everything you need. You’ll need a belt system to connect the motors to the wheels, which is important for transferring power. For a detailed guide, you can view some top tutorials on Facebook.
The battery supplies the power for your rechargeable pack. You can’t ride a rechargeable electric skateboard when the power goes out; the motor relies on the battery. When propelled by the user’s feet, the skateboard retains the functionality of a regular skateboard. The skateboard deck provides stability, and the wheels provide traction and maneuverability.
Knowing the basics of rechargeable skateboard physics, power requirements, and components will help you make informed decisions when selecting electric skateboard kits and parts. This will ensure that your DIY electric skateboard will reach speeds and provide the ride of your dreams.
The Necessary Materials
For a thrilling skateboarding experience, let’s get started by gathering the necessary materials and tools for this exciting DIY project. If you’re new to this, electric skateboard kits can simplify the process.
- As a self-made project, you’ll need new products and electric skateboard parts such as a carbon fiber longboard deck, an electric motor, a speed controller, motors, motor engines, and a battery pack. Always ensure you have battery chargers on hand to keep your ride powered.
- Additionally, ensure the right parts are built, and board tools on hand, such as screwdrivers, wrenches, skateboard parts, and a soldering iron.
- With everything in place, you’re ready to begin assembling your board. Watch a tutorial video to learn important points about using torque and making a cheaper board. You can still use your skills in the future.
Assembling Your Favorite Board

It’s time to dive into the exciting process of assembling your very own DIY electric skateboard! We want you to build a unique electric skateboard that will bring you and others joy.
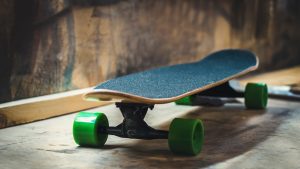
- Apply Grip Tape: Peel off the backing of the grip tape and carefully lay it onto the deck. Smooth out any air bubbles and ensure that the grip tape adheres securely to the deck. Use a sharp blade to trim the excess grip tape around the edges of the deck.
- Position the Trucks: Place the trucks on the deck, making sure they are aligned symmetrically. Use the mounting hardware to attach the trucks to the deck. Tighten the nuts securely, ensuring that the trucks are firmly attached but still allow for smooth movement.
- Install Bearings into Wheels: Press the bearings into the wheel hubs. Ensure that the bearings are seated evenly. Use a bearing press tool or the truck axle to apply even pressure when installing the bearings. Repeat this process for all the wheels.
- Mount Wheels onto Trucks: Slide the wheels onto the trucks’ axles, ensuring that the bearings fit snugly into the wheel hubs. Tighten the axle nuts, but leave them loose enough to allow the wheels to spin freely. Adjust the tightness to achieve the desired level of wheel resistance.
- Attach Riser Pads (Optional): If your longboard includes riser pads, place them between the trucks and the deck. Riser pads can help prevent wheel bite and provide additional clearance. Secure the riser pads using the mounting hardware.
- Check and Adjust: Double-check all components to ensure they are securely fastened. Tighten any loose nuts or bolts and make any necessary adjustments to achieve the desired tightness for trucks and wheels. Test the longboard to ensure that the wheels spin freely, the trucks are responsive, and the overall assembly is stable.
Troubleshooting
Now that you’ve assembled your electric skateboard kit, it’s time for the exciting part – testing and troubleshooting. You must ensure your first electric skateboard ride is safe and smooth, understand common issues you might encounter, and understand their solutions. With the right throttle control and understanding of weight distribution, you’ll glide through the streets effortlessly, making the most of your electric skateboard.
- Check Wheel Bearings: Slow or uneven movement can often be attributed to dirty or damaged wheel bearings. Remove the wheels and inspect the bearings for dirt, debris, or signs of wear. Clean and lubricate the bearings regularly to maintain smooth rotation. If bearings are damaged, replace them with new ones.
- Inspect Trucks and Bushings: Loose or tight trucks can significantly affect your longboard’s stability and maneuverability. Check the tightness of the kingpin nut and make adjustments as needed. Additionally, inspect the bushings for wear or damage. Replace worn-out bushings to ensure proper responsiveness and control.
- Evaluate Deck Integrity: Examine the deck for any signs of cracks, warping, or delamination. A compromised deck can lead to structural issues and pose safety risks. If you identify any damage, it’s crucial to either repair or replace the deck promptly. Regularly inspect the deck for wear and tear to prevent accidents.
- Assess Wheel Alignment: Uneven wheel alignment can cause wobbling and instability during rides. Ensure that all wheels are properly aligned and tightened. If your longboard has adjustable truck angles, experiment with different settings to find the configuration that provides the most comfortable and stable ride for your preferences.
So, follow our quick guide to ensure your ride is packed with fun and excitement without burning a hole in your pocket and that with the regular price. With the right knowledge and form, anyone can master an electric skateboard without breaking the bank on unnecessary costs. Join the electric skateboard revolution and ride on with confidence!
Ensuring Skateboarding Safety During The First Ride
Before hitting the road on their self-made electric skateboard, it’s crucial to prioritize safety during your inaugural ride. At FamilyHype, we encourage readers to share their experiences and opinions about longboarding safety and money.
Understanding Common Issues And Their Solutions
Let’s dive into the skateboard world and explore some common issues that may arise with your DIY electric skateboard and the potential solutions, ensuring you can keep on rolling with confidence and without spending extra money.
Battery troubleshooting is often needed, such as checking the terminals for corrosion and ensuring a strong connection, which can save you money on replacement batteries. For those looking to build a self-made electric skateboard, there are skateboard kits available that come with all the necessary DIY electric skateboard parts. Regularly check for any abnormalities to prevent power loss.
Customization
Amping up your electric skateboard with a personal touch and new products isn’t just fun; it’s a unique way to express your style and make your ride truly one of a kind. You can also save money instead of buying regular-priced items. You do this parts in three ways:
- Deck Design Variety: Explore a diverse range of deck designs featuring vibrant graphics, trendy colors, and an assortment of shapes and sizes to find the perfect match, if not close to the perfect board, for your personal style and preferences.
- Wheel Customization: Tailor your riding experience by carefully selecting wheels that align with your individual riding style and comfort preferences. Whether it’s for cruising, carving, or downhill riding, choose the wheels that enhance your overall riding experience.
- Personalized Accessories: Infuse your longboard with your unique personality by adding creative elements such as vibrant lights, eye-catching decals, and other distinctive accessories. Transform your board into a true reflection of your style and make it stand out on the streets.
Rechargeable Longboard Maintenance
Maintaining and caring for your electric skateboard is essential for protecting your safety and ensuring a smooth ride each time. Deck protection is paramount to prevent damage from wear and tear, while battery longevity is critical in maintaining optimal performance. Regularly check the skateboard bearings, bushings, how the parts are built, motors, motor engines, and wheels for wear and tear, and inspect the battery for any visible signs of damage or corrosion.
By caring for your electric skateboard, you’re serving your adventurous spirit and preserving your beloved skateboard’s life. Many skateboards in the market have cables and receivers, but for your DIY electric skateboard, you may just skip this one. The most important thing is installing batteries with high amps so you can spend longer hours skateboarding.
Conclusion
We’ve embarked on an exciting journey—building your DIY electric skateboard. Assembling and customizing your electric skateboard has been challenging yet rewarding, especially with the motors, motor engines, and electric skateboard parts. Remember, consistent maintenance for skateboard parts is key for a smooth ride. Don’t be discouraged by any hiccups along the way—they’re part of the adventure!
Frequently Asked Questions (FAQs)
How To Make A Rechargeable E-Board At Home?
To create your homemade electric skateboard, you will need reliable rechargeable skateboard kits, battery packs, motor mounts, dual motors, a suitable motor shaft, electric skateboard parts, and an electronics enclosure to protect the components. With a relatively small budget, you can save money by assembling the parts yourself or not buying skate parts at a regular price. Follow online guides and tutorials to ensure a safe and successful build.
What Do I Need To Make An E-Board?
You may build your own DIY electric skateboard using the following components: a deck, a motor, a battery, a speed controller, wheels, trucks, engine motors, a motor battery pack, motor mounts, and a controller for the electric skateboard’s movement. Tools such as screwdrivers and a soldering iron may also be necessary for the assembly process.
Can You Use A Rechargeable Board Without Power?
You can’t ride a rechargeable electric skateboard when the power goes out, or the battery pack is not working; the motor relies on the battery. However, when propelled by the user’s feet, it retains the functionality of a regular skateboard. You can still use this quick view.
How Do Rechargeable E-Boards Break?
The most common reasons for rechargeable electric skateboards to break are worn-out bearings, broken electrical components, and malfunctioning batteries or motors. Careful handling and regular maintenance of your electric skateboard can prevent many common issues. Buy new products and motor mounts that are trusted.
How Much Power Does A Rechargeable E-Board Use?
A rechargeable electric skateboard, depending on the model, can require 200 to 2,000 watts of power. Total power consumption is sensitive to factors such as skateboard rider weight, terrain, and speed. Kits can be a great option for those looking to customize their ride, often available at a reasonable price in USD. Each kit typically includes a single motor, a battery, and all necessary components built to ensure optimal performance. Be sure to check the product code and sign up for updates on new models and deals.
Can E-Boards Go Downhill?
Just like conventional skateboards, electric skateboards may go downhill. Most electric skateboards feature a remote-controlled braking system and motor mounts that let riders safely adjust their pace on descents. For better performance on various terrain, many models include a pulley system. To ensure you’re getting the best support, choose the series or models of skateboards designed for different needs. Add your favorite model to your cart and take advantage of current deals to save on your next purchase.
How Do You Make A Sharp Turn On An E-Board?
Lean your body in the desired direction while modifying your weight on the electric skateboard to produce a sharp turn on an electric skateboard. Adjust the speed using the remote control to improve control during the turn.
Can You Turn Any Skateboard Into A Rechargeable Skateboard?
Yes, with a quick view- electric skateboard kits can turn any skateboard into a DIY electric skateboard. These kits typically include a motorized wheel, battery, and controller that can be installed onto a regular skateboard to transform it into a rechargeable skateboard.
What Is A Hybrid Electric Skateboard?
A hybrid electric skateboard is a versatile skateboard with features suitable for both regular and powered skateboarding, allowing seamless transition between power modes. This is cheaper than regular-priced ones.
What Are Electric Skateboards Called?
Last Updated on July 6, 2024 by Jeanne Meets
DISCLAIMER (IMPORTANT): This information (including all text, images, audio, or other formats on FamilyHype.com) is not intended to be a substitute for informed professional advice, diagnosis, endorsement or treatment. You should not take any action or avoid taking action without consulting a qualified professional. Always seek the advice of your physician or other qualified health provider with any questions about medical conditions. Do not disregard professional medical advice or delay seeking advice or treatment because of something you have read here a FamilyHype.com.