
Are you an avid skateboarder looking to enhance your tricks and slides or for professional use? Skate wax for your board is a must-have tool to achieve smoother rides and conquer challenging obstacles. While store-bought wax is readily available and some are great, there’s something uniquely satisfying about creating your very own at home. So how to make skateboard wax? Not only is it a fun and creative project, but it also allows you to customize the wax depending on your preferences. In this article, we will guide you through a simple and cost-effective DIY process to creating a high-quality slick from scratch. Whether you’re a seasoned rider or a curious enthusiast, get ready and dive into the world of DIY slick-making! Take your street surfing experience to the next level by learning all the different tips and tricks we can offer you in this guide.
Get your materials ready and let’s slide smoothly into the exciting world of homemade skateboard slick!
Key Takeaways
- How to make your skateboarding wax at home. It is a fun and rewarding DIY project.
- Homemade skateboarding wax allows you to customize the texture and performance to suit your preferences, all at a fraction of the price. You can find tutorials on YouTube for additional guidance.
- Prioritize skateboarding safety by working in a well-ventilated area and using heat-resistant equipment.
- Apply the wax to clean surfaces such as ledges, rails, and curbs for smoother slides and grinds.
- Start with a thin layer and spread the skateboarding wax evenly for better skateboarding.
- Test and adjust the skateboarding wax application to achieve the desired level of slipperiness to make.
- Reapply wax as needed to maintain a smooth surface on the obstacles.
- Be considerate of other skateboarders when using shared street surfing spaces.
- Clean up any excess skateboarding wax and remove it from surfaces if necessary.
- With your homemade skateboarding wax, enjoy enhanced street surfing experiences and improved tricks.
Making Skate Wax At Home
Creating skateboarding wax at home is a fun and straightforward DIY project for skateboarders. You can search for wax melting techniques on Google to refine your process. Skateboarding wax is used to ensure a smooth surface on ledges, rails, or other obstacles to help you slide more smoothly and perform tricks with ease, often at a fraction of the price.
Assemble your skateboarding wax by melting candles or wax bars as melted wax, creating DIY curb wax melt as an alternative to purchasing from a skate shop. Here’s a simple guide to making your wax at home:
Materials You’ll Need For DIY Wax
To make skate wax, you need Pyrex brand container, oil, stirring frequently, for melting, on hard surfaces to prevent tiny cracks. Here are other materials needed for DIY wax.
- Paraffin or candle stubs (available at make or craft stores or old candles)
- Cooking pot or microwave-safe container
- Cooking spray or vegetable oil (optional)
- Silicone mold or any small container (e.g., ice cube tray)
- Wax paper or parchment paper (for easy removal from the mold)
Step-By-Step Wax Creation Instructions
Create skate wax by melting both the beeswax and colored candles on a low to medium oven temperature setting, adding more beeswax as needed, until the mixture becomes butter soft; then, pour it into molds, let it cool, and use gulf wax for a smoother finish, or buy wax for convenience, melting it in warmer water as it boils. Here’s the wax step process:
- Prepare the mold: For this wax step, you can choose a silicone mold or any small container to give you the desired slick shape. An ice cube tray can work well for this purpose. Line the mold with wax paper or parchment paper big enough to hold the slick once it has cooled.
- Break the slider: If using a large block of paraffin wax, break it into smaller chunks. This will help the slick melt more evenly and quickly.
- Melt: How to melt it? There are two common wax-step methods for melting: using a cooking pot on the stovetop or a microwave-safe container in the microwave.
(a) Stovetop method: Place the wax pieces in a cooking pot with melting wax and set it on low heat. Stir occasionally to make sure even melting. Be cautious not to overheat the slick to avoid fire hazards. To safely make skateboard wax using an oven, pro tip: always keep safety in mind by using a dedicated oven and avoid putting it in kitchen stores; melt for a few minutes until liquid.
(b) Microwave method: Place the slick pieces in a microwave-safe container and microwave in short intervals (e.g., 20-30 seconds). Stir after each interval to promote even melting. Repeat until the wax is fully melted. - Optional: Add lubrication (cooking spray, vegetable oil, or canola oil) to the melted wax if you want it more slippery. This wax step is not necessary, but it can enhance the performance of the slick.
- Pour the skateboard wax into the mold: Carefully pour the wax into the prepared mold, filling each compartment evenly. Leave a little room at the top to prevent overflow.
- Let the skateboard wax cool: Allow the slick to cool and solidify completely. This wax step may take a few hours, depending on how you apply and the size and thickness of the slick pieces.
- Remove the skateboard wax from the mold: Once the slick has solidified, gently pop it out of the mold. If you used slick paper or parchment paper, it should come out easily.
- Clean up: Clean your cooking pot or microwave-safe container immediately after use. Slick can be challenging to remove once it cools and solidifies.
Safety Measures
While building one at home is a fun and rewarding DIY project, it’s essential to know how to keep yourself safe during the process. Here are some safety measures to follow:
- Work in a Well-Ventilated Area: Make you have proper ventilation while melting the wax. This will help prevent inhaling any fumes that may be released during the melting process.
- Use Heat-Resistant Equipment: If using a stovetop, be sure that the cooking pot you use is heat-resistant and has a stable base. If using a microwave, choose a microwave-safe container big enough to hold the wax for your skateboard, and heat it in short intervals (e.g., 20-30 seconds).
- Avoid Overheating: Be cautious not to overheat the slick. Always use low to medium heat when melting the slick on the stovetop, or microwave it in short intervals. Overheating can lead to fire hazards or cause the slick to become dangerously hot.
- Use Oven Mitts or Heat-Resistant Gloves: When handling the melted slick or the container, use oven mitts or heat-resistant gloves to avoid burns.
- Keep Children and Pets Away: If you have kids or pets at home, make sure they are kept away from the area where you’re working with hot slick to prevent accidents.
- Keep Flammable Materials Away: Make sure that there are no flammable materials near the slick melting area, as the process involves heat and fire.
- Protect Your Work Surface: Place the cooking pot or microwave-safe container on a heat-resistant surface or use a protective layer to prevent damage to your countertop or work area.
- Dispose of Slick Properly: If you have leftover slick or any spills, allow it to cool and solidify before disposal. Avoid pouring slick down the sink, as it can clog the drains.
- Be Cautious When Pouring: Take care when pouring the melted slick into the mold to avoid spills or splatters that can cause burns.
- Clean Up Thoroughly: After the wax has solidified, gently pop it out of the mold to remove any excess and pour the wax. Slick can be challenging to remove once it cools and solidifies.
- Personal Protective Equipment (PPE): Consider wearing safety goggles and an apron or old clothing to protect yourself from accidental spills and splatters.
Remember, you should keep yourself safe during any DIY project. By following these safety measures, you can enjoy crafting your street surfing board slick while minimizing the risk of accidents and injuries.
Homemade Skateboarding Wax
Once you have crafted your homemade skateboarding slick, it’s time to put it to good use. You can make homemade skateboarding wax using olive oil and any type of wax that melts; just watch as you pour it into a mold. But here’s a way to effectively use your DIY slick for smoother slides and better performance during your street surfing sessions:
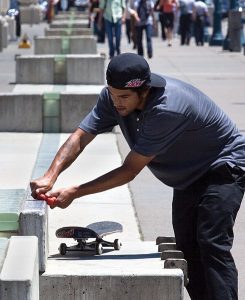
- Identify the Right Surfaces: Look for ledges, rails, curbs, or other street surfing obstacles that you wish to slick. Make sure that the surface is clean and free from dirt and debris before applying the slick.
- Apply To The Skateboard: Rub the homemade street surfing board slick back and forth along the surface you want to slick. Apply a thin layer of slick at first and gradually build it up as needed. The goal is to make a smooth and even coat on the surface.
- Spread the Skateboard Wax Evenly: How to spread the wax? Use your fingers or the slick itself to spread the slick evenly across the surface. This will make a consistent and predictable slide.
- Test and Adjust: After applying the slick, test it out with a few slides or grinds to see how it performs. If you find that the surface is too sticky or not smooth enough, you can add more slick or adjust the application. Make sure to use it evenly.
- Reapply To The Board as Needed: Over time, the slick will wear off from repeated use. Make sure to reapply the slick to maintain a smooth surface on the obstacle. Before reapplying, Always clean off any residue or dirt left from previous use.
- Be Mindful To Others: If you’re skating in a public area or a skate park, make sure to be considerate of other skaters. Applying slick to a shared obstacle is acceptable, but avoid over-waxing it, as it can be too slippery to the surface for others to use safely.
- Remove Excess Wax: How to remove if you accidentally apply too much slick and find the surface too slippery? You can use a cloth or a piece of cardboard to remove some of the excess.
- Practice Safety: As always, prioritize safety while street surfing. This is how you practice safety. Be aware of your surroundings, wear appropriate protective gear, and be mindful of any potential hazards.
- Clean Up: If you need to remove the slick from a surface, use a plastic scraper or putty knife to gently scrape it off. Be careful not to damage the obstacle in the process.
Remember that different street surfers may prefer varying amounts of slick on the same obstacle, so feel free to experiment and find what works best for you. With your homemade skateboarding slick, you’ll create smoother slides and enhanced maneuverability, helping you take your street surfing skills to new heights. Happy skating!

Conclusion
Crafting your street surfing board slick at home is a fantastic way to enhance your street surfing experience and improve your performance on various obstacles. The DIY process allows you to create a personalized slick that suits your preferences and style of street surfing. By following the simple steps outlined in this guide and adhering to safety measures, you can create a high-quality slick that provides a smooth surface for slides and grinds. Utilizing the right kind can result in all the differences.
Creating street surfing boards slick at home is not only a fun and creative project, but it also fosters a deeper connection with the street surfing culture. As you apply your homemade slick to ledges, rails, and curbs, you’ll experience the satisfaction of knowing you’ve contributed to your street surfing adventure. For those interested in DIY slick creation, skateboarding wax can be a key component.
While enjoying the benefits of your DIY slick, remember to maintain a responsible and respectful attitude towards other skaters and public spaces. Applying the right amount of slick and being mindful of shared obstacles ensures that everyone can enjoy a safe and enjoyable street surfing experience. Doing your version also allows you to control the kind of oil used, giving you an extra level of customization. You may use different kinds of oil, including cooking oil, vegetable oil or canola oil.
With your newly crafted street surfing board slick, you’ll be able to push your skills to new heights, slide smoother, and unlock a world of possibilities for tricks and stunts. So, gear up, grab your street surfing board, and hit the streets with the confidence that your homemade slick will help you take your street surfing journey to the next level.
Ensuring that your materials are oven-safe can contribute to a successful and safe creation process. Happy skating! Finally, don’t overlook the potential benefits of incorporating cooking oil and skate wax into your DIY mixture for an even smoother skateboarding slide.
Happy skating!
Frequently Asked Questions:
Last Updated on July 3, 2024 by Inma Barquero
DISCLAIMER (IMPORTANT): This information (including all text, images, audio, or other formats on FamilyHype.com) is not intended to be a substitute for informed professional advice, diagnosis, endorsement or treatment. You should not take any action or avoid taking action without consulting a qualified professional. Always seek the advice of your physician or other qualified health provider with any questions about medical conditions. Do not disregard professional medical advice or delay seeking advice or treatment because of something you have read here a FamilyHype.com.