
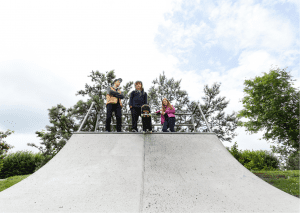
We’re thrilled to have you join us to build this exciting mini ramp DIY halfpipe project: building your skateboarding halfpipe. This article recognizes the importance of hands-on work and the joy of shredding on a halfpipe you created with your two hands. Safety is our top priority when it comes to constructing a wide, sturdy halfpipe skate ramp or a backyard mini. Quality wood for the build ensures a flat and reliable structure, guaranteeing countless hours of safe and enjoyable skating. Whether you’re constructing this halfpipe with ramp step for yourself, your kids, or your community, this article guides you through each step—from planning to maintenance—with straightforward instructions and helpful tips.
Skateboarding, a popular sport among kids and adults alike, is ideal for those looking to get outside and have fun. This mini ramp DIY halfpipe project is perfect for those who want to build their halfpipe or quarter pipes with a ramp step and take their skills to the next level. Whether you’re interested in building skateboards halfpipe or quarter pipes with or without a ramp step, adding drill holes for extra stability through drill bits, ensuring it has the same length as your specifications, incorporating ramp armor for durability, including transition pieces for a smoother ride, or finishing it with a smooth surface in the top layer, this project offers endless possibilities.
With the right materials such as drill bits, patience, and a few helpful tips, you can create your very own custom mini ramp or backyard mini with a ramp step in no time. Utilize a layer of plywood for the final layer or top layer, provide a flat bottom that’s feet wide, and add a steel pipe for added sturdiness. Don’t forget to follow the skate mini ramp plans and secure it with exterior screws for a perfect skateboarding experience!
Key Takeaways
This article will cover how to create your halfpipe from scratch with a ramp step, incorporating elements like a chalk line, and mini ramps, and utilizing OC mini ramps for an added touch. Skateboarding is a super fun and exciting sport that people of all ages enjoy.
Safety should always be a priority when constructing your halfpipe or quarter pipes. Check for wear and tear before riding, and keep it clean and maintained to ensure it lasts long. Don’t forget to wear your helmet, pads, and shoes before hitting the skate ramp for the ultimate thrills. Ensure the construction step includes the use of an impact driver for efficiency, drill bits, and make sure to do the cutting of the sheet of 3/8 plywood for sturdy ramp foundations. A well-defined flat section is crucial for a smooth ride, and utilizing a concrete pad with the services of professionals for construction and maintenance can contribute to the longevity of your halfpipe. Rest assured that with these added features and precautions, your skateboarding experience will be both thrilling and safe.
Planning And Designing Your Halfpipe Ramp
Before you can start hammerin’ and sawin’ or make a cut, you’ll need to plan and design your backyard mini halfpipe, making sure it’s exciting and safe. You may also watch a video on YouTube to get ideas on how to make your backyard mini easily. After that, start by measuring and sketching out the features on paper with a pencil before building the pieces.
Everyone can understand the importance of a safe and enjoyable skateboarding experience. That’s why we must consider its location, ensuring enough space for a thrilling ride and safety for all riders.
Balancing functionality with halfpipes aesthetics is crucial, too – we want a thrilling ride without compromising on looks! When designing, include coping, transition, and deck. Additionally, think about its size, shape, and angle.
Let’s now gather what we need to bring our design to life.
Gathering Materials For The Halfpipe Ramp
Now that we’ve got our design, it’s time to gather the local hardware or materials for our mini ramp DIY halfpipe. Choosing the right wood is crucial, not only for durability but also for safety reasons. We’ll start with a sturdy layer of plywood as the base for our halfpipe. Make sure to measure it, after that, select a high-quality layer of plywood to ensure the structure’s stability and longevity.
In addition to the sheet of plywood, we should acquire a pair of safety glasses to protect our eyes during construction. Safety should always be a top priority when working on a project like this.
To create the curved transition of our halfpipe, we’ll need a length of PVC pipe that matches the desired curvature. This PVC pipe will serve as a guide for shaping the top layer of your DIY mini ramp.
Don’t forget the drill bits and other tools for constructing.
Once we have the local hardware or main materials in place, start with the construction. Attach the PVC pipe along the top layer of plywood and use it as a guide for the first final layer of the skate ramp. You may need to secure the PVC pipe with clamps or screws to keep it in place.
Now, let’s talk about the surface. We’ll be using multiple sheets of plywood to create a smooth riding surface or top layer. Make sure to layer the multiple sheets of plywood securely, ensuring final layer align correctly. This will give us a sturdy and smooth riding surface for BMX biking.
To complete the transition at the top corner, you may need to drill a hole (small one) or notch to accommodate the PVC pipe properly. This will ensure that the PVC pipe forms a smooth and consistent curve for your halfpipe.
Remember to double-check that you have all the necessary tools and local hardware or materials on hand before starting construction to make the process as smooth and safe as possible.
Choosing The Right Wood For The Mini Ramp
When it comes to constructing your halfpipe, picking the right kind of wood is essential for ensuring safety and longevity. It is highly recommended to use weather-resistant varieties like pressure-treated pine or marine plywood sheets.
This is because we’re not only constructing for fun but also for providing the skateboarding community with a safe environment. Other tools and materials needed for this mini ramp DIY halfpipe journey include nails, screws, saws, sandpaper, and other woodworking tools.
Ultimately, find for the right wood to construct it and create a safe environment for the skateboarding community.
Other Required Materials
The skateboarding community wants to ensure our beloved skateboarders have the top quality and safest environment possible. That’s why having the right local hardware tools and materials is essential.
Here are some of the necessary items to ensure a top-notch, safe vert board experience:
- Safety Equipment – Wearing the right safety equipment is an absolute must for anyone involved in building it.
Quality Wood Screws – High-grade wood screws are essential for keeping the skate frame together securely.
Power Tools – Power tools are important for efficient work but don’t forget to take care of your tools with regular maintenance.
Measuring Tape – A measuring tape is essential for exact measurements and precision.
These items are the foundation of creating a robust, safe halfpipe with a strong ramp foundation. We can move on to the frame construction with these basics in place.
Making The Frame Of The Halfpipe
Now that we’ve got all our materials, we’re ready to dive into the exciting process of constructing our halfpipe.
First, we’ll focus on setting up a strong and stable base, as it’s crucial for our safety and the longevity of our skate ramp.
Then, we’ll move on to constructing the sides – this is where things start taking shape, and you can see your halfpipe coming to life!
Setting Up The Base
Let’s kick things off by setting up the base of your mini ramp DIY halfpipe, ensuring a solid ramp foundation for all those rad tricks you’re gonna pull off.
Here’s how:
Level The Halfpipe: Start building with Ground Leveling, eliminating uneven spaces.
Implement Safety Measures; wear gloves and safety goggles while building it.
Lay down the plywood at the bottom accurately.
Secure it with screws for stability.
Doing all of this correctly will help you finish the skateboard DIY mini ramp and sides of the ramp that define the shape of your halfpipe.
We believe safety should always come first. That’s why you should wear protective gear like gloves and safety goggles when constructing your mini ramp DIY halfpipe. Level the ground, lay down the plywood accurately, and secure it with screws for stability.
Constructing The Halfpipe Sides
Now that you’ve laid the foundation, bringing your dream halfpipe to life is time. You can construct the sides of the ramp with precision and care. The priority is side stability, so you need to select quality plywood that prioritizes resilience overlooks. Safety should never be compromised – an experience that should be thrilling, exciting, and enjoyed with utmost safety.
With different things and components that contribute to the overall experience, such as the board itself to the trucks, wheels, bearings, and grip tape, each element plays a role.
However, in this discussion, we’ll focus on the structure of the halfpipe and what it takes to assemble a sturdy and reliable piece of equipment. We’ll consider factors such as the size and shape of the pipe, the materials used, the ramps’ angle, and the sides’ stability.
Now, let’s move forward and make our thrilling halfpipe more real by installing the ramps.
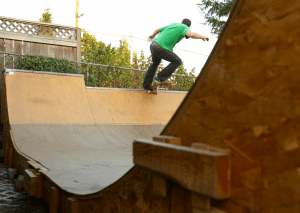
Installing The Vert Board Ramp
Installing the ramps isn’t just about creating a physical structure; it’s shaping your playground for creativity and daring feats in a curved section. We want to ensure skateboard ramp safety and attach many screws to the layer of plywood sheets for sturdiness. Furthermore, we’ll paint them too, considering vibrant or muted paint choices that reflect our style while enhancing visibility.
As we perfect the ramps, we eagerly anticipate adding the finishing touches, including a small notch for added character and challenge, to make it uniquely ours. With the skateboard ramp installed, skateboarders can now enjoy their stunts and tricks in a safe and stylish environment, all while appreciating the attention to detail in the final layer of our design. We’ve used the same amount of care and dedication for each element, ensuring that the two sheets of plywood seamlessly come together to provide an exceptional skateboarding experience.
Finishing Touches
Now that your skateboard ramp is in place, it’s time to put those finishing touches that will truly make this concrete space a reflection of you and your passion for skateboarding.

- Safety Measures: Install skate railings or skate padding (concrete pad) where needed to ensure the safety of skateboarders.
- Artistic Halfpipe Detailing: Paint the skate ramp with graffiti or your favorite designs to add a unique touch.
- Personal touches: Add banners, lights, or stickers to make the skatepark your own.
These enhancements will help you create an enjoyable and safe skatepark that reflects your love of skateboarding. Consider skateboarding staples like speed, style, and skill as you make your space your own.
Maintenance And Care
Maintaining your freshly crafted skatepark isn’t just about keeping it clean; it’s about prolonging the life of your ramps and ensuring they’re always ready for your next session. Regular checks for wear and tear are crucial safety precautions.
Using water-resistant sealants to weatherproof your ramps, you can protect them from rain or snow and provide a great skating experience for yourself and others.
We understand the importance of caring for your vert board and recommend checking for damage and applying sealants regularly to keep everyone safe.
Skateboard maintenance and care involve more than just cleaning. It also includes identifying the care necessary (in this case, skatepark maintenance and care) and factors specific to your needs (weatherproofing, identifying wear and tear, and applying protective coatings).
Conclusion
We’ve done it, folks! We’ve built our halfpipe from scratch. Here at FamilyHype, we’re excited to hear from our readers about their experience constructing their halfpipe. Let us know what you think!
Safety should always be a priority when constructing your needed halfpipe. Check for wear and tear before riding, and keep the flat bottom section and sides of the ramp clean and maintained to ensure it lasts long. Don’t forget to put your gear on before hitting the ramp for the ultimate thrills. Make sure the piece of plywood used for the halfpipe is in good condition, and inspect the boards for any damage.
Happy skating! Be sure to share your experience with us here at FamilyHype. We’d love to hear your feedback on how you push your limits and draw inspiration from your homemade halfpipe. Remember to put some screws on the boards together securely and check the length of the halfpipe to make any necessary adjustments.
Frequently Asked Questions (FAQs)
How Much Does It Cost To Make Vert-Ramp?
The cost of constructing a halfpipe for skateboards can vary depending on factors like size, steel used, other materials, and location. The cost can range from a few hundred to a few thousand dollars for a basic one. Thick plywood and additional layers of plywood can add to the cost, and if it’s an outdoor ramp, you may need to consider weatherproofing materials to account for wood movement. Constructing a mini ramp or halfpipe in the backyard can be a significant investment, but it offers an exciting riding surface for skateboarders to enjoy.
How Do You Make Vert Ramp?
To make a halfpipe for skateboarding, start by planning the design and dimensions using a tape measure. Build the frame and structure of the ramp using sturdy materials like plywood for the final layer. Incorporate quarter pipes on both ends of the mini ramp to create a smooth transition and ensure the entire ramp is securely built for a safe and enjoyable skateboarding experience.
Is It Hard To Make Vert Ramp?
Constructing a halfpipe for skateboarding can be challenging, especially for those without prior experience in construction or woodworking. It requires careful planning and precise measurements to create the four-quarter pipes with the correct pivot point for smooth transitions. Additionally, using tools like a circular saw, cobalt drill bits, and a countersink drill bit to work with materials such as plywood and black steel pipe requires some skill and knowledge of construction techniques. However, with the right tools such as drill bit, materials, and dedication, creating the create the four-quarter pipes is possible, but creating the four-quarter pipes may not be a straightforward DIY project for everyone.
What Do I Need To Make Vert Ramp?
To build a half pipe or mini ramp, you will need steel pipe coping to provide a smooth edge for grinding and sliding. Gather mini ramp plans to ensure accurate measurements and construction guidelines. Use a drill to to drill a hole for exterior screws that will hold the ramp together securely, and include expansion joints to allow for the wood’s natural movement. Build the ramp in two layers, with the quarter pipe in the same place on both ends, to achieve a smooth and enjoyable riding experience.
Where Is A Boarder Moving The Fastest On Vert Ramp?
A skateboarder moves the fastest on a half pipe (mini ramp) at the bottom of the transition, right before reaching the other side. This is when the skateboarder gains maximum speed due to the gravity in place and the momentum built up from riding down the curved surface of the half pipe. Just make sure that every screw is attach properly to avoid accidents.
How Steep Is Vert Ramp?
A typical halfpipe for skateboarding has an incline or steepness of around 8 to 12 feet on each side, resulting in a total height of 16 to 24 feet. This steepness allows skateboarders to gain enough speed and momentum to perform tricks and maneuvers effectively while providing a challenging and thrilling riding experience.
What Is The Difference Between Super Pipe & Vert Ramp?
The main difference between a superpipe and a halfpipe is their size and height. A superpipe is significantly larger, often used in snowboarding, and can reach heights of 18 to 22 feet or more, while a halfpipe used in skateboarding is generally smaller, typically ranging from 8 to 12 feet in height. Both feature similar construction techniques, involving the drilling of holes through a drill bit and building in multiple layers, especially with steel pipe for sturdiness, but the scale of a superpipe is much larger than that of a traditional skateboard ramp or mini ramp DIY half pipe.
What Type Of Plywood Can Be Used For Mini Ramp?
In line with constructing a halfpipe, it is recommended to use high-quality, sturdy plywood that can withstand the pressure and impact of difficult skateboarding tricks. The ideal type of plywood for a halfpipe is usually a high-grade exterior or marine-grade plywood. This type of plywood has better durability and weather resistance, making it suitable for outdoor skate ramps, but it can also be used for indoor halfpipes to ensure a long-lasting and safe riding surface. When constructing a mini ramp or halfpipe, selecting the right plywood is crucial to the ramp’s overall performance and longevity.
What Material Is Used For Decks?
Half-pipe decks are typically made of multiple layers of high-quality plywood and steel pipe. The second final layer is an essential part of the construction, providing additional strength and stability to the deck. Builders use drills ( drill bit ) to create holes and secure the layers together, ensuring a sturdy and durable base for the half pipe or mini ramp. The use of strong plywood material, steel pipe, and proper construction techniques contribute to a safe and reliable half-pipe deck for skateboarding. Don’t forget also to paint the deck.
How Wide Should Vert Ramp Be?
The width level of a half pipe or mini ramp can vary depending on the desired size and purpose. However, a typical width for a half pipe or mini ramp used in skateboarding is around 8 to 12 feet long, providing enough space for skateboarders to perform tricks and maneuvers comfortably in the flat space. Builders use drill bits to create holes. By using drill bits it secure the structure while constructing the mini ramp or half pipe to ensure stability and safety. Also, a steel pipe is used for sturdiness.
Is It Advisable To Use Pressure Treated Wood In Building A Ramp?
Yes it is. Pressure treated wood is lumber that has been treated with chemical preservatives to protect it from decay, insects, and other damaging elements. By using a pressure treated wood, you will be able to build a durable wide ramp. This is because a pressure treated wood is designed to last long. If you use a pressure treated wood, you will surely make your new ramp last longer. One example of this is masonite.
Last Updated on July 5, 2024 by Raymond Sy Tamco
DISCLAIMER (IMPORTANT): This information (including all text, images, audio, or other formats on FamilyHype.com) is not intended to be a substitute for informed professional advice, diagnosis, endorsement or treatment. You should not take any action or avoid taking action without consulting a qualified professional. Always seek the advice of your physician or other qualified health provider with any questions about medical conditions. Do not disregard professional medical advice or delay seeking advice or treatment because of something you have read here a FamilyHype.com.