
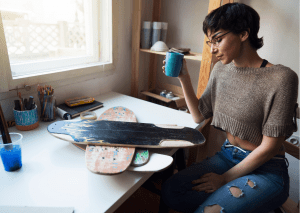
Introducing the perfect way to express yourself with your skateboard design creations! Everyone can understand that you want your DIY skateboard to be a reflection of you – unique, creative, and full of character. This article is here to guide you through the exciting process of designing your skateboard to add flair to your skate ride.
Think about how gratifying it will be when your friends admire your new one-of-a-kind board, knowing that you didn’t just buy it off the shelf but rather poured time, effort, and creativity into its customized style, for example, by adding unique graphics from a local shop. We’ll cover everything from understanding your style, gathering materials, prepping the board, implementing the style, and adding those final touches. Plus, we’ll share some handy maintenance tips to keep your custom DIY skate ride looking fresh for longer.
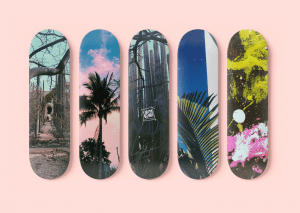
- The deck creation process of your DIY skate graphic design includes several steps, such as concept development, illustration, graphic work, and, of course, customization. It’s important to keep in mind that each step of your DIY skate graphic design requires careful consideration and attention to detail. You’ll need to think about color palettes, font choices, and other creative elements to craft a unique, eye-catching DIY skate graphic design for your deck.
Additionally, you’ll need to choose the right material for your deck, such as wood, plastic, or metal, as well as the right type of painters tape and other finishing materials. Once the customization is complete, you can start personalizing your deck with decals, stickers, and other accessories.
Ready to show your colors? Let’s basically dive in together and create a deck that is truly a reflection of you and your professional individual style!
Key Takeaways
You can check insights on creating your own deck graphic style, and we hope you’ve been inspired to make something unique that expresses yourself. Show the world your colors and wow them with your creativity.
Whether you’re a professional beginner or a pro, it’s important to ensure that your board is completely well-maintained for a safe and smooth ride.
Understand Your Style
- Before you dive into designing your skateboard’s graphics, it’s crucial that you’ve got a firm grasp on your personal style to create a truly custom skateboard that reflects your edge. This is the first step, and it significantly influences the aesthetic of your custom creation or DIY skate graphic design.
- We understand how important it is to express your individuality, so let’s ensure that your deck style truly reflects you with the DIY skate graphic design. Identifying your style inspiration helps us tailor a look that aligns with your personal aesthetics.
Now that we’ve established this foundation, we’re ready to move on to collecting our materials and creating something unique.
Gather Your Materials
- Finding the right materials for your creative journey of DIY skate graphic design is important. Before you get started, you’ll need to budget for quality paint pens and clear coat spray, which may be pricey but will pay off in the end for vibrant designs that last.
- To ensure you find the perfect deck for your transformation project of your DIY skate graphic design, it’s important to consider some other parts, such as the wheels, trucks, and bearings, and gather the right tools for the job. They play an essential role in producing a high-quality board, especially when you want to make the physical look of it even nicer.
With the right materials and tools in hand, you’re ready to start your skateboard project and give it a makeover, considering every detail from deck designs to choosing the appropriate truck.
Preparing Your Skateboard Design
Before we dive into the fun part of creating our own DIY skate graphic design, we’ll need to prepare our blank skateboard deck properly.
First things first before going to the DIY skate graphic design part, we must clean it thoroughly to remove any dirt or grease that could interfere with our paint job.
Afterward, sanding it down is essential as this process allows for a smoother surface and better adhesion of our paints and primers, ensuring that our creation will look its best.
Cleaning Your Skateboards
We know the value of a sanded skateboard deck and the importance of proper preparation for creating unique graphics. Before you dive into your creativity, make sure to thoroughly scrub your board to remove any dust or stains for an unblemished canvas.
Skateboards, like any other sporting equipment, require regular maintenance and cleaning, and the effort pays off in the clarity and vibrancy of your designs.
Now that we’ve accomplished the cleaning process, let’s gently transition to prepping our board further with sanding. Skateboarding is a hobby that requires careful preparation and attention to detail, and we’re here to provide helpful advice and guidance for your skateboarding journey, especially with the DIY skate graphic design.
Sanding Your Longboards
- Giving your skateboard a good sanding isn’t just about creating a smooth surface—it’s about preparing a unique canvas for your creative ideas or DIY skate graphic designs to come to life, especially when working on a blank skateboard deck with thick paint. Proper dust management and effective sanding techniques are essential for this step. We know it can seem tedious, but the results will be worth it.
- Once we’ve created a perfect surface through effective sanding techniques, we can confidently begin crafting our imaginative designs and DIY skate graphic designs on our skateboard, using a template for precision.
This isn’t just about smoothing out the surface but crafting a canvas that allows your creativity to explode. If you take the time to properly manage the dust and use effective sanding techniques, you can make sure your skateboard is ready for you to bring your imaginative designs to life. So, don’t be afraid to get creative and let your ideas flow!
Implementing Your Design
After finalizing your concept with inspiration from YouTube videos, it’s time to bring your vision to life on the skateboard deck with precision and creativity, making it truly your own creation.
- We understand that implementing your creative vision with your DIY skate graphic design can be tricky and require patience. Employing color theory and focusing on execution will yield stunning results to your DIY skate graphic design. Each stroke reflects your personal style, so take the time to make sure you’re satisfied with the artwork. When you’re done with the DIY skate graphic design, it’s time to add the crucial finishing touches to make it truly unique and personalized.
Color theory, design execution, and finishing touches, combined with regular practice, are all important pieces of the puzzle when it comes to making a skateboard that reflects your own personal style and preferences.
Adding Finishing Touches
After breathing life into your skateboard with a personalized DIY skate graphic design, it’s time to add the finishing touches that will ensure its longevity.

This article highly recommends opting for high-quality sealing techniques, protective coatings, waterproof finishes, and UV-resistant sealants to prevent color fading. Regularly check your skateboard and reapply as necessary.
By following these DIY skate graphic design tips and putting in the hard work, you can maintain your custom skateboard’s unique aesthetic appeal and share your skateboarding experience with the world.
Deck Maintenance Tips
Everyone can’t deny the importance of preserving your skateboard and keeping the spirit of skateboarding alive. Maintaining your board’s pristine condition doesn’t have to be a complicated process.
Here are some helpful tips to keep your deck and DIY skate graphic design in its best condition:
- Keep your board dry and away from direct sunlight.
- Regularly clean and lubricate your bearings for smooth rides.
- Invest in a protective wax or skateboard grip tape to protect your board from wear and tear.
- Monitor the condition of your wheels and bushings, and change or replace them as needed.
These are just a few of the ways that you can care for your skateboard and keep the DIY skate graphic design in top-notch condition. We hope this advice helps you to keep the spirit of skateboarding alive!
Conclusion
We’ve shared our insights on creating your own DIY skate graphic design, and we hope you’re now inspired to make something unique that expresses yourself. Show the world your colors and wow them with your creativity. Whether you’re a beginner or a pro, keep maintaining your skateboard for lasting brilliance. Keep skating, folks!
Frequently Asked Questions (FAQs)
How Do They Make Board Graphics?
Years ago, skateboard graphics were typically hand-painted onto blank skateboard decks. Nowadays, the process of DIY skate graphic design has evolved, and skateboard graphics are often created using a combination of techniques. One method involves using vinyl decals, spray paint, and painter’s tape to create intricate designs and patterns on a blank deck, resulting in a custom and eye-catching finished product.
What Is The Design Under A Skateboard Called?
The design under a skateboard is called the “graphic” or “skateboard deck graphic.” It is the artwork or design that is applied to the bottom of the skateboard deck.
How Can I Customize My Board At Home With A Personal Design?
- To customize your DIY skate graphic design at home, first, you need to sand the background of the skateboard deck to prepare the surface for painting. Then, create a new DIY skate graphic design or use stencils to lay out the image you want to paint on the deck. Pull out your painting materials, such as spray paint or acrylic paint, and use the stencil, painter’s tape, or freehand technique to transfer the design onto the bottom of the deck, resulting in a personalized and unique DIY skate graphic design.
How Do You Put Illustrations On A Deck To Enhance The Design?
- Designs can be applied to a skateboard deck in various ways, such as screen printing, spray painting, heat transfer, using vinyl decals, or hand painting with acrylic paint. Each method of DIY skate graphic design allows for customization and personalization of the skateboard’s design according to your preferences.
Can I Put My Own Picture On Deck?
Yes, you can put your own picture on a skateboard. To do this, start by selecting a skateboard with a suitable base color that complements your picture. Print your picture or design onto paper, cut it out, and then apply it to the skateboard deck using glue or adhesive. Once the picture is securely attached, you can add other colors or details around the edges to enhance the overall design. Finally, seal the custom artwork with a clear coat of gloss to protect and preserve your personalized skateboard creation. This process is fairly simple and allows you to skate with your own unique design.
Can You Put Vinyl On Skateboard?
Yes, you can put vinyl on a skateboard to customize its design. Vinyl decals or stickers can be applied to the skateboard deck, allowing for easy and removable customization.
Can I Use Acrylic Paint On Skateboard?
Yes, you can use acrylic paint on a skateboard to design a custom artwork. Ensure the surface is clean and properly prepped before painting, and consider using a clear gloss finish to protect the custom design. You can also use grip tape to protect your board even more.
How Do You Put Graphics On A Blank Skateboard?
To put graphics on a blank or new skateboard, start by creating or obtaining the design you want on the skateboard. Then, cut the design out of adhesive vinyl using a hobby knife or exacto knife. Peel off the backing of the adhesive vinyl, stick the design onto the skateboard deck carefully, ensuring it is aligned and free of bubbles, and you’ll have a personalized skateboard with your chosen graphics.
How Are Skateboard Graphics Screen Printed?
Skateboards are screen printed using a stencil or a screen with the desired design. The screen is placed over the skateboard deck, and ink is applied over the stencil using a squeegee. Painter’s tape or masking tape may be used to cover specific areas to prevent ink from reaching certain parts of the design. Once the ink is applied, the screen is removed, leaving behind the screen-printed graphic on the skateboard deck.
How Do I Display My Skateboard?
You can display your skateboard by using wall-mounted skateboard racks with easy-to-follow instructions or simply hanging it on the wall using hooks for an air of sophistication at the center of your room. Another option is to lean it against a wall or place it on a shelf as a decorative piece.
Last Updated on June 8, 2024 by Allen Laconsay
DISCLAIMER (IMPORTANT): This information (including all text, images, audio, or other formats on FamilyHype.com) is not intended to be a substitute for informed professional advice, diagnosis, endorsement or treatment. You should not take any action or avoid taking action without consulting a qualified professional. Always seek the advice of your physician or other qualified health provider with any questions about medical conditions. Do not disregard professional medical advice or delay seeking advice or treatment because of something you have read here a FamilyHype.com.